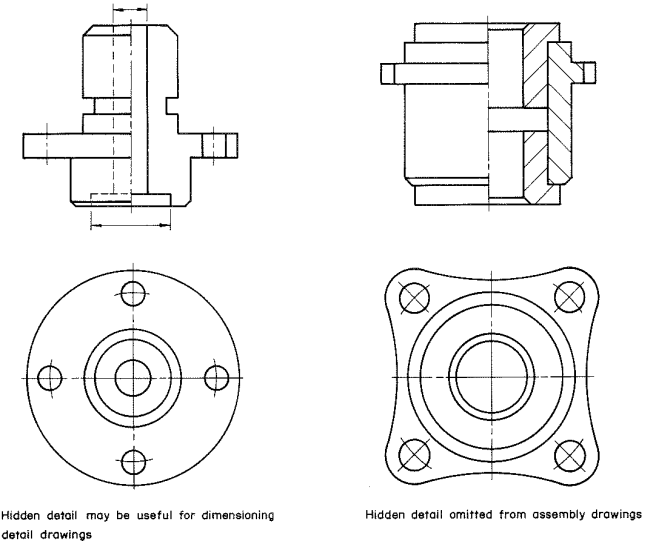
| Symmetrical parts may be shown to advantage by half sections, that is with one half drawn in section and the other shown as an outside view. Thus two views are combined in one with a consequent saving of draughting time and space. Half sections have the disadvantage that the dimensioning of the hidden features may be difficult without using hidden detail lines, and for this reason they are more often used for assembly drawings. Few dimensions, if any, are needed on assembly drawings, and hidden detail can be omitted from the un-sectioned half of the view. Examples of half sections are given in Figure 3.6 (a) and (b). Note that the halves of a half section are separated by a centre line and not by an outline. 
Figure 3.6 Half sections |
 Resource Centre
 Student Portal